Mini quiche bites became my go-to when I needed something quick but satisfying, especially when I wanted to avoid the usual brunch overload. They’re surprisingly versatile, letting me play with flavors and ingredients based on what’s in the fridge. Plus, they’re just the right size for a handful, which makes snacking feel a little more special.
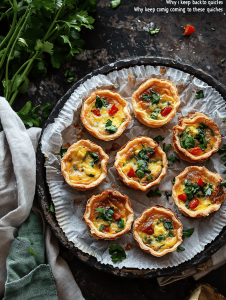
Why I keep coming back to these tiny quiches
They’re quick, endlessly customizable, and always satisfy a craving for savory comfort. Plus, they’re perfect for sharing without fuss, making any gathering feel a bit more special. No matter how busy or chaotic the day, these bites bring a moment of calm—delicious and simple.
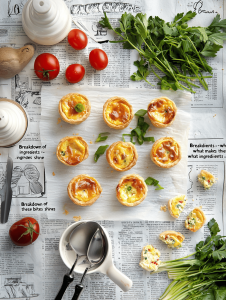
Breakdown of ingredients—what makes these bites shine
- Eggs: The base, providing structure and richness. Use fresh eggs for a vibrant yellow and better flavor.
- Heavy cream: Adds a silky texture and helps the bites puff up slightly. Substitute with whole milk if needed.
- Cheese: Melted cheese like Gruyère or cheddar adds gooeyness. Use what melts best for your flavor.
- Fillings: Ham, spinach, mushrooms—anything you love. They bring personality and balance to each bite.
- Salt & pepper: Simple seasoning that enhances all flavors. Adjust to taste.
- Herbs: Fresh parsley or chives add brightness. Feel free to experiment.
- Pie crust or puff pastry: Optional base, for extra flaky bites. Skip for a gluten-free or low-carb version.
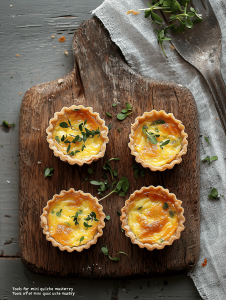
Tools of the trade for mini quiche mastery
- Mini muffin tin: Shape the bites and ensure even cooking.
- Whisk: Combine eggs and cream smoothly.
- Sharp knife: Chop fillings precisely.
- Cooling rack: Allow the quiches to cool evenly without becoming soggy.
Step-by-step to your perfect mini quiche bites
Step 1: Preheat your oven to 190°C (375°F).
Step 2: Grease a mini muffin tin with butter or non-stick spray.
Step 3: In a bowl, whisk together 3 eggs, ¼ cup heavy cream, and a pinch of salt.
Step 4: Chop your choice of fillings—think ham, spinach, or cheese—and distribute evenly in each muffin cup.
Step 5: Pour the egg mixture over fillings, filling each about ¾ full.
Step 6: Bake for 15-20 minutes, until the edges are golden and the centers are just set.
Step 7: Let cool in the tin for 5 minutes, then transfer to a wire rack to cool further.
Cooking checkpoints and tips to keep in mind
- Ensure the egg mixture is well combined for an even bake.
- Watch the edges—if they brown too quickly, tent with foil.
- Check the center with a toothpick—if it comes out clean, they’re ready.
- Avoid overfilling the muffin cups to prevent spillover and uneven cooking.
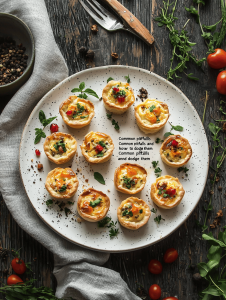
Common pitfalls and how to dodge them
- Overbaking, leading to dry bites.? USE the right oven temperature. If edges burn, lower heat or cover loosely with foil.
- Filling overflowing during baking.? DON’T overfill the muffin cups. If spillover occurs, wipe and reduce filling.
- Soggy fillings ruining texture.? Ensure fillings are pre-cooked if needed. If soggy, drain excess moisture.
- Uneven texture or pockets of uncooked egg.]}]},? Mix eggs thoroughly. If mixture separates, beat a little longer.

Mini Quiche Bites
Ingredients
Equipment
Method
- Preheat your oven to 190°C (375°F) and lightly grease your mini muffin tin.
- In a bowl, whisk together the eggs, heavy cream, salt, and pepper until the mixture is smooth and slightly frothy.
- Chop your choice of fillings—ham, spinach, mushrooms—and evenly distribute them into each muffin cup.
- Sprinkle grated cheese and chopped herbs over the fillings in each cup, adding as much as you like for flavor.

- Pour the egg mixture into each muffin cup, filling about three-quarters full to prevent spillover.

- Place the muffin tin in the oven and bake for 15-20 minutes, until the edges are golden brown and the centers are just set with a slight puff.
- Remove from the oven and let the quiche bites cool in the tin for about 5 minutes, then transfer them to a cooling rack to cool completely.
- Once cooled, serve the mini quiche bites warm or at room temperature, enjoying their tender, cheesy texture and savory flavors.

Hi, I’m Theo Granger, the voice and recipe creator behind Boldly Overseasoning.
If you believe salt is not the enemy, spices should be generous, and flavor should never whisper when it can sing, then you are absolutely in the right place. Boldly Overseasoning is my unapologetic celebration of big flavor, confident cooking, and trusting your instincts in the kitchen. I created this space for people who are done with bland food and ready to cook with courage.

Leave a Reply